|
Clutch Master Cylinder Installation / Fabrication Tips
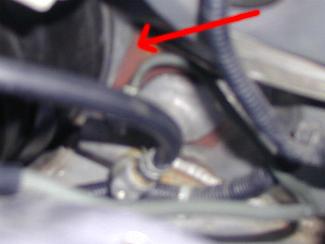
This can get trickey because this is where you start hacking up your car. Page 12-5 will give some pointers.Either find someone with a Prelude to use as a guide or just guestimate. The easiest way to mount the master cylinder is to make a template out of cardboard so you can easily make your marks before you drill. Whatt you can do is take your clutch pedal and hold it up to about where you "think" you want it and and make some marks. I also recommend making two plates from 18 Gauge steel to help stiffen the weak firewall. This will help make the clutch pedal sturdy because when doing a swap, you will most likely not have a bracket to help hold the clutch peadel up. These plates are real easy to make. Just cut them a little bigger than your master cylinder template (that you made earlier), but not so big that they will not mount flush against the firewall (you will get my point when you start doing it). Just put one plate on the outside (against firewall) and the other inside the passenger compartment against the firewall. Now you can mount the clutch pedal. It will bolt right on the the backsideof the master cylinder.
| Plate Fabricated for Reinforcing the Firewall |
|
Clutch Pedal and Brake Pedal Installation Tips
This section is very Important
Remove the old brake pedal assembly and put the 5spd specific one in its place. Hook up the brake switch and make sure it works properly. Used page 19-5 for pointers. I've heard that some people cut thier brake pedal, but I DO NOT recommend it. Installation of the clutch pedal may be easier if you have the brake pedal off at that time. Its up to you and how well you work in tight spaces.
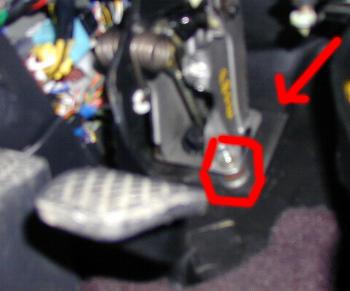
Time to mount the clutch pedal. Its is best to have a helper present to hold the master cylinder while you tighten down the nuts. Before you start tightening, you need to check to see if your clutch pedal assembley came wth spacers SEE PIC BELOW. Most likely they will not, but you may get lucky. These spacers are located behind the paedal assembly against the firewall. My pedal did not come with these spacers and we did not know that they even existed at first. My clutch was slipping more and more as the car warmed up, but would stop slipping if cooled down by driving on the highway. This was real confusing and time consuming considering we had not idea what the problem was. After a quick inspection of my friends Prelude, I noticed the spacers. Problem solved. I obviously did not have the spacers, so I looked around for something the same size. Luckily the self locking nuts that I removed from the damper forks (page 13-8 show a good pic) worked. You are supposed to repalce these anyway, so we got lucky. What we did was position the master cylinder with the two fabricated plates in place, put the two nuts on (with the flat side against the plate), and anded a washer to the side closest to the passenger compartment. Now just tighten everything up and make your adjustments using page 12-4 and 12-5 as a reference. There may be some trouble shooting involved to make your clutch operate properly. Depending on your application and fabrication pieces, you may need to add/remove washers to the backside of your clutch pedal assembly to get the proper pedal rod movement. The best way to test your spacer set-up is to do some city style driving (stop and go) and stay away form the highway because it will cool off your clutch and cuase it not to slip. Luckily we got it right on the first try, buy you may need to add/remove accordingly. Remenber that every time you make changes to your pedal, you will need to make the proper adjustements found on page 12-4.
Bleeding the Clutch System
Now that you have everything together the clutch lines will be bone dry. We tried to bleed the conventional way for quite some time without luck. You need a vacuum bleeder to pull the fluid throught the system. You will thank yourself.
| Clutch Pedal Spacer and Plate |
|
Shift Assembly and Gauge Cluster Removal / Installation
Use page 20-45 to aid in the removal of your center console. You can now remove all the automatic shifter assembly and related items. Now just bolt up your new gear shift mechanism using page 13-13 as a reference. Replacing the gauge cluster is just as easy, as well as optional. The auto cluster will work just fine. The 5spd cluster is plug-in-play (minus the plug for the gear selction). First, remove the two screws holding the trim piece in place, then pry the panel working gently because you don't want to mark it up. Now you have access to to the actual cluster. Use page 23-65 for reference.
Wiring and Computer Related Issues
Computer..You can use you auto ECU if you like (NOT RECOMMENDED) and do some creative wiring to get rid of the check engine light. There will be some idling issues (randomly pulsing idle) but the check engine light will not be on. Please go here for the specifics regarding rewiring the Auto ECU to get rid of the check engine light. If you plan to use a 5spd ECU you can unhook and remove the TCM (Transmission Contol Module) otherwise you can leave it in. Page 11-4 will give you an idea of where the components are. If you are lucky and have a 5spd ECU, you can put this in ONLY if you have the red learning key (and take it to Honda)or have a Honda dealer rewrite the replacement ECU (A competant Honda Dealer with the proper equipment should be able to rewrite the ECU in a few minutes) with your vehicles Immobilzer code. Follow the instuctions closely starting on page 23-195. I did run the auto ECU for a while , but have since gone to a Honda dealer to have the 5spd ECU programmed with my immobilizer code and it works great!
The next page has all the wiring necessary to get your Prelude safely on the road.
|